Start a live streaming
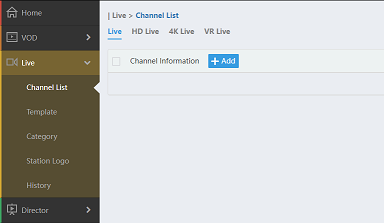
1. Goto channel list page
Click menu "Live" -> "Channel List" to enter channel list page.
2. Create new channel
Click "Add" button to show creating new channel dialog box.
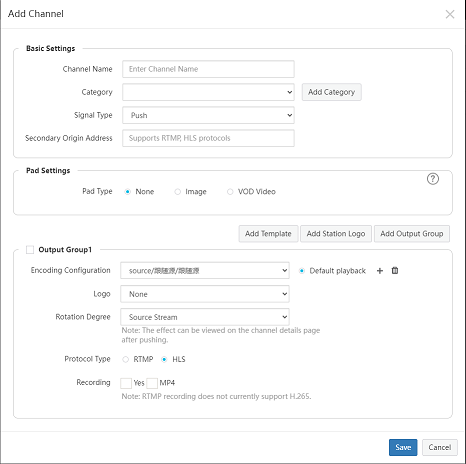
2.1 Basic Settings
Enter the basic information like channel name, category and live source.
(1) Click "Add Category" to create new category.
(2) Live sources have following types:
- Push: Push stream to server.
- Pull: Pull stream from exist stream, support rtmp, http-flv, http-hls, http-ts streams.
(3) Secondary source:
- If primary source is missing, the secondary source will be used automaticly.
- Support rtmp, http-flv, http-hls, http-ts streams.
2.2 Pad Settings
Pad is used if primary source and secondary source are all missing, it supports image or video.
2.3 Output Group
- Each channel may contain one or more output groups.
- Each group contain template, station logo, rotation etc.
- Each group contain one RTMP or HLS output stream.
- Each hls stream contain one or more tempate to implement multi-bitrate streams.
- Each group also support recoding.
3. Save channel
If channel is created, the channel list page will be refreshed and shown like below:
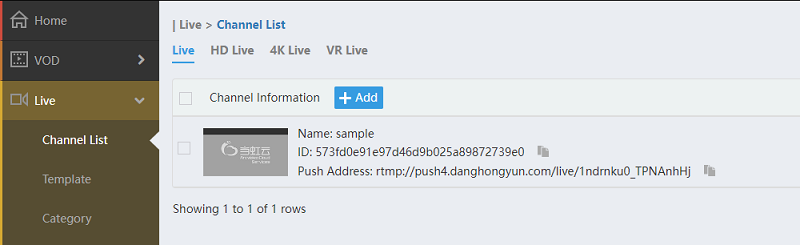
(1) Each line display the channel id, name, push address/or pull address, category, source status and channel status.
(2) Click the channel thumbnail or name to view the channel detail, and you can get the play url for each group.
4. Get push stream url
Find the push/pull address url in channel list, click the "![]() " button behind the url to copy it.
" button behind the url to copy it.
5. Push stream
Use push stream client tool (eg. obs) to push stream, the push target should be set to the url copied on previous step.
6. Start streaming
If stream is pushed to the server, the channel status is changed:
- The channel source status is changed to "Normal" status.
- The channel status is changed to "Ready" status
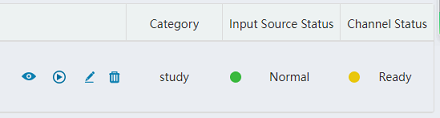
Now you can click "![]() " button to start channel.
" button to start channel.
7. Preview output stream(s)
Click "![]() " button to preview output stream(s).
" button to preview output stream(s).
8. Stop streaming
Click "![]() " button to stop live streaming.
" button to stop live streaming.